In my last blog post we looked at how to deploy our Flask application using Gunicorn on Amazon's EC2 service. That blog post was more focused on getting a very simple test case up and running, but one thing we didn't cover in detail was how best to manage our Gunicorn process.
If you recall from the previous post, we set up our server with Nginx acting as the web server listening for traffic on port 80, which forwarded requests to our Flask application server (Gunicorn) running on port 8000. This works well, except for the fact that we aren't really looking after our Gunicorn process. A Gunicorn process can die because of a coding error, or perhaps some other external factor. We also want our Gunicorn process to start again in the event of a reboot.
To kick things off, let's install supervisord:
[ec2-user@ip-172-31-6-157 ~]$ sudo pip install supervisor --pre
We need to set the configuration for supervisor. First, run the following command:
[ec2-user@ip-172-31-6-157 ~]$ echo_supervisord_conf
This should print out a sample configuration file to your terminal. Let's use this as the basis for our configuration.
[ec2-user@ip-172-31-6-157 ~]$ sudo bash -c '/usr/local/bin/echo_supervisord_conf > /etc/supervisord.conf'
[ec2-user@ip-172-31-6-157 ~]$ sudo vi /etc/supervisord.conf
At the very bottom of the script, add the following block and adjust to suit your application.
[program:myapp]
command = /home/apps/.virtualenvs/myapp/bin/python /home/apps/.virtualenvs/myapp/bin/gunicorn app:app -b localhost:8000
directory = /home/apps/myapp
user = apps
autostart=true                ; start at supervisord start (default: true)
autorestart=true                ; whether/when to restart (default: unexpected)
Save the file, and now let's start supervisor. We want supervisor to start automatically at boot time, so we will need an init script for this. Supervisor doesn't usually come packaged with an init script, but you can download one from this link.
[ec2-user@ip-172-31-6-157 ~]$ cd /etc/init.d
[ec2-user@ip-172-31-6-157 init.d]$ sudo bash -c 'wget https://gist.githubusercontent.com/MattHealy/a3772c19b6641eb3157d/raw/06932656e8a173e91e978468a10d837a69a1ecfa/supervisord'
[ec2-user@ip-172-31-6-157 init.d]$ sudo chmod +x supervisord
[ec2-user@ip-172-31-6-157 init.d]$ sudo chkconfig --add supervisord
[ec2-user@ip-172-31-6-157 init.d]$ sudo /etc/init.d/supervisord start
The above commands ensure that every time the machine is restarted, supervisor will start automatically, and in turn will start our Gunicorn process for serving our Flask app.
This blog post explains how to get your Flask app up and running on Amazon EC2. This tutorial assumes you can use a Unix-like terminal environment (e.g. Linux or Mac OS X)
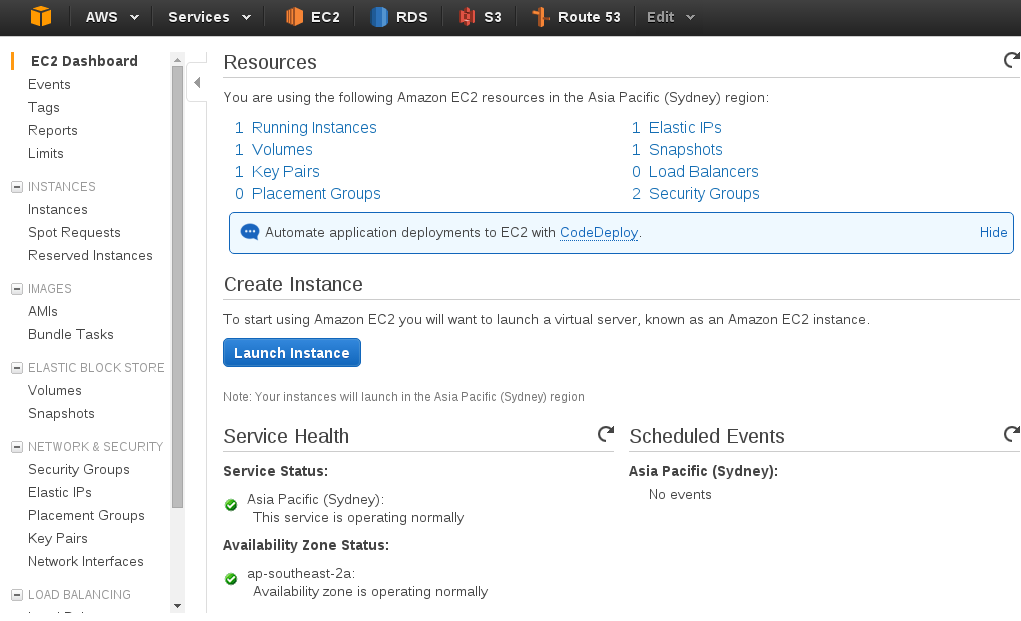
Firstly, within your Amazon Management Console, you need to create an EC2 instance. Click the "Launch Instance" button
Let's choose "Amazon Linux" as our base machine image.

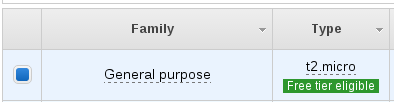
Now you can choose your machine type - to keep things within the free tier let's choose a t2.micro instance. All new Amazon Web Services customers can use the "free tier" to run certain services for 12 months at no cost.
We'll now continue with "Review and Launch"
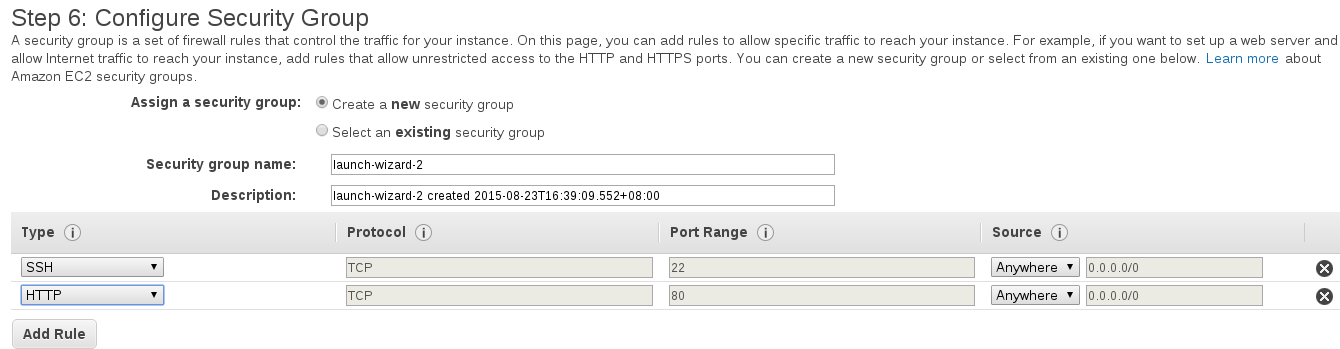
From here, we can click "Edit Security Groups" and define our firewall rules. We want to allow SSH from anywhere so we can get in and modify our instance, and also allow HTTP traffic (Port 80) to our instance from the Internet.
Go ahead and launch the instance, ensuring you either already have a key pair file or you create a new key pair.
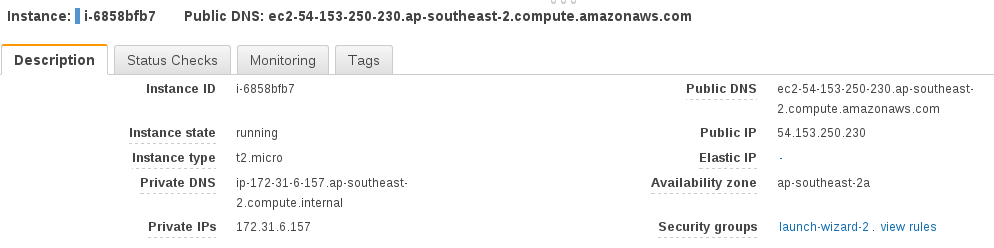
After your instance finishes booting, you can SSH in to continue with our deployment. View the instance details to get our public DNS address:
and SSH in:
ssh -i /path/to/your/keyfile ec2-user@your_public_dnsname_here
Now we want to create a user which will run our Flask app. It is a good idea to run our Flask app as a separate user and definitely not run it as root. It can be dangerous to run a service as root because if that service was to be compromised somehow (e.g. by a bug in our code) then the attacker would have access to our whole system.
[ec2-user@ip-172-31-6-157 ~]$ sudo /usr/sbin/useradd apps
Change to the apps user:
[ec2-user@ip-172-31-6-157 ~]$ sudo su apps
[apps@ip-172-31-6-157 ec2-user]$ cd ~
[apps@ip-172-31-6-157 ~]$ mkdir myapp
[apps@ip-172-31-6-157 ~]$ cd myapp
Now upload the code for your Flask app - you could do this by cloning from an existing Git repository, but for this tutorial we'll just create a simple test app. Use your favourite text editor (mine is Vim) to create app.py:
from flask import Flask

app = Flask(__name__)

@app.route('/')
def index():
    return "It works!"

if __name__ == '__main__':
    app.run(debug=True)
We'll run our Flask app in a virtual environment, so let's install virtualenvwrapper.
[apps@ip-172-31-6-157 myapp]$ exit
[ec2-user@ip-172-31-6-157 ~]$ sudo easy_install pip
[ec2-user@ip-172-31-6-157 ~]$ sudo pip install virtualenvwrapper
[ec2-user@ip-172-31-6-157 ~]$ sudo su apps
[apps@ip-172-31-6-157 ec2-user]$ cd
[apps@ip-172-31-6-157 ~]$ vi .bashrc
Add the following lines
export WORKON_HOME=$HOME/.virtualenvs
export VIRTUALENVWRAPPER_VIRTUALENV_ARGS='--no-site-packages'

source /usr/bin/virtualenvwrapper.sh
This allows us to access the virtualenvwrapper command line tools easily. Let's reload our .bashrc profile and create a virtual environment.
[apps@ip-172-31-6-157 ~]$ . .bashrc
[apps@ip-172-31-6-157 ~]$ mkvirtualenv myapp
Now install your project's dependencies - typically this will be from running pip install -r requirements.txt, but for this example I'll simply install Flask:
(myapp)[apps@ip-172-31-6-157 ~]$ pip install Flask
We don't want to use the Flask development server, as it is not safe to do so for a production environment, so let's also install Gunicorn to serve our Python code.
(myapp)[apps@ip-172-31-6-157 ~]$ pip install gunicorn
We'll need a web server installed on our instance, because we're going to forward requests from port 80 to our Flask app running internally. It is best practice to have a web server handle our port 80 requests, because the Flask application server (Gunicorn) we are using is designed to serve Python code, but not ideal for handling port 80 requests from the Internet.
(myapp)[apps@ip-172-31-6-157 ~]$ exit
[ec2-user@ip-172-31-6-157 ~]$ sudo yum install nginx
[ec2-user@ip-172-31-6-157 ~]$ sudo vi /etc/nginx/nginx.conf
Replace this line:
user nginx;
with this:
user apps;
and in the http block, add this line:
server_names_hash_bucket_size 128;
And now let's define a server block for our site:
[ec2-user@ip-172-31-6-157 ~]$ sudo vi /etc/nginx/conf.d/virtual.conf`
Paste in the below:
server {
    listen       80;
    server_name  your_public_dnsname_here;

    location / {
        proxy_pass http://127.0.0.1:8000;
    }
}
Start the web server
[ec2-user@ip-172-31-6-157 myapp]$ sudo /etc/rc.d/init.d/nginx start
And finally, let's start our Gunicorn process to serve our Flask app:
[ec2-user@ip-172-31-6-157 myapp]$ sudo su apps
[apps@ip-172-31-6-157 ~]$ cd ~/myapp
[apps@ip-172-31-6-157 ~]$ workon myapp
(myapp)[apps@ip-172-31-6-157 myapp]$ gunicorn app:app -b localhost:8000 &
This will set our Gunicorn process off running in the background, which will work fine for our purposes here. An improvement that can made here is to run Gunicorn via Supervisor. Supervisor can look after our Gunicorn processes and make sure that they are restarted if anything goes wrong, or to ensure the processes are started at boot time. I'll be writing a followup post about implementing Supervisor later on.
Now, if you visit your public DNS name in your web browser, you should see something like the below:
Congratulations! You have now successfully deployed your Flask app to an Amazon Web Services EC2 server.