AWS CodeCommit is Amazon Web Service's Git hosting service and part of their suite of developer tools. It can be thought of as a comparable service to something like GitHub or GitLab although being completely honest both of those services are ahead of CodeCommit in terms of usability and feature set. It does however have the advantage of being closely tied to other AWS services, in particular IAM for permission management.
CodeCommit allows for the usual development workflow of Pull Requests. However, something annoying about this is that you can only view outstanding pull requests against a single repository. There is no way in the AWS Console to have an overview of all outstanding pull requests across all code repositories in your account (within the current region).
As someone who is responsible for performing code reviews, I found this quite frustrating in that I couldn't at a glance see how many PR's are waiting for my review and thus started to fall behind in making those reviews. As you may know from my earlier blog entries, one thing I love about AWS is that almost anything can be scripted using their API or CLI interfaces.
Using the excellent Boto3 Python library, I managed to create the below script which I find useful for summarising all outstanding pull requests in the account.
import boto3
import argparse

parser = argparse.ArgumentParser()

parser.add_argument(
    '--repo', metavar='repo', type=str,
    help='Optionally filter by repository')

args = parser.parse_args()
filterRepository = args.repo

client = boto3.client('codecommit')
region = client.meta.region_name

pullRequests = []

resp = client.list_repositories()
repositories = resp['repositories']

for r in repositories:

    if filterRepository:
        if r['repositoryName'] != filterRepository:
            continue

    resp = client.list_pull_requests(
        repositoryName=r['repositoryName'],
        pullRequestStatus='OPEN',
    )

    pullRequestIds = resp['pullRequestIds']
    for p in pullRequestIds:
        pullRequests.append(p)

for i in pullRequests:

    resp = client.get_pull_request(
        pullRequestId=i
    )

    pr = resp['pullRequest']

    title = pr['title']
    description = pr.get('description')
    lastActivity = pr['lastActivityDate']
    created = pr['creationDate']
    authorArn = pr['authorArn']

    targets = pr['pullRequestTargets']

    for t in targets:

        repo = t['repositoryName']

        link = 'https://{}.console.aws.amazon.com/codesuite/'.format(region) + \
               'codecommit/repositories/{}/pull-requests/'.format(repo) + \
               '{}?region={}'.format(i, region)

        print("\nLink:\n{}".format(link))

        print("\nRepo: {}".format(t['repositoryName']))
        print("Source branch: {}".format(t['sourceReference']))
        print("Target branch: {}\n".format(t['destinationReference']))

    print("Created: {}".format(created))
    print("Last Activity: {}".format(lastActivity))
    print("Author: {}\n".format(authorArn))

    print("Title: {}".format(title))
    print("Description: {}\n".format(description))

    print("------------------------------------------------------")
A neat feature of Amazon Web Service's API Gateway service is that it can integrate directly with other AWS services. The most common use of API Gateway is to integrate directly with a Lambda function, typically to perform an action like update a DynamoDB table or send a message to an SQS queue. But, sometimes it is not actually necessary to use a Lambda function at all - by taking advantage of API Gateway's AWS service integration, we can avoid this intermediary step altogether and build a much more efficient and resilient architecture.
I recently had a need to provision a simple API endpoint that would accept a JSON payload and store the data to be processed later. Typically I would look to use API Gateway backed by a basic Lambda function to accept the JSON data and store it in an SQS queue. Instead, for this project I opted to use the API Gateway AWS service integration with the SQS queue.
By using the AWS service integration, we benefit in a number of ways:
- There is no code to write or maintain
- Reduced latency - with no Lambda function to start (potentially from a cold start) we can receive a response from the API Gateway much quicker
- We don't eat in to our allocated Lambda invocation limits. By default, we only have 1,000 concurrent executions allowed across all functions. When we use the AWS service integration this limit doesn't concern us.
There are a number of blog posts that do an excellent job of describing how to set up this API Gateway to SQS architecture, but none that explain how to do the same using CloudFormation, Amazon's "Infrastructure as Code" solution.
After a bit of trial and error, I managed to come up with the below Cloudformation template which does the following:
- Creates an SQS queue with the name based on the parameter supplied
- Assigns a queue policy allowing messages to be sent to the queue
- Creates an IAM Role with permissions to allow API Gateway to send messages to SQS
- Creates a REST API endpoint with POST method, configured with the SQS integration
Please feel free to use the below template or modify it to suit your own needs.

Description: API Gateway integration with SQS
Outputs:
  ApiEndpoint:
    Description: Endpoint for this stage of the api
    Value: !Join
      - ''
      - - https://
        - !Ref 'APIGateway'
        - .execute-api.
        - !Ref 'AWS::Region'
        - .amazonaws.com/
        - prod
  QueueArnSQS:
    Description: ARN of SQS Queue
    Value: !GetAtt 'DestQueue.Arn'
Parameters:
  queueName:
    Description: The name of the SQS queue to create.
    Type: String
Resources:
  APIGateway:
    Properties:
      Description: API Endpoint to receive JSON payloads and queue in SQS
      Name: APIGateway
    Type: AWS::ApiGateway::RestApi
  APIGatewayRole:
    Properties:
      AssumeRolePolicyDocument:
        Statement:
          - Action:
              - sts:AssumeRole
            Effect: Allow
            Principal:
              Service:
                - apigateway.amazonaws.com
        Version: '2012-10-17'
      Path: /
      Policies:
        - PolicyDocument:
            Statement:
              - Action: sqs:SendMessage
                Effect: Allow
                Resource: !GetAtt 'DestQueue.Arn'
              - Action:
                  - logs:CreateLogGroup
                  - logs:CreateLogStream
                  - logs:PutLogEvents
                Effect: Allow
                Resource: '*'
            Version: '2012-10-17'
          PolicyName: apig-sqs-send-msg-policy
      RoleName: apig-sqs-send-msg-role
    Type: AWS::IAM::Role
  DestQueue:
    Properties:
      DelaySeconds: 0
      MaximumMessageSize: 262144
      MessageRetentionPeriod: 1209600
      QueueName: !Ref 'queueName'
      ReceiveMessageWaitTimeSeconds: 0
      VisibilityTimeout: 30
    Type: AWS::SQS::Queue
  PolicySQS:
    Properties:
      PolicyDocument:
        Statement:
          - Action: SQS:*
            Effect: Allow
            Principal: '*'
            Resource: !GetAtt 'DestQueue.Arn'
            Sid: Sid1517269801413
        Version: '2012-10-17'
      Queues:
        - !Ref 'DestQueue'
    Type: AWS::SQS::QueuePolicy
  PostMethod:
    Properties:
      AuthorizationType: NONE
      HttpMethod: POST
      Integration:
        Credentials: !GetAtt 'APIGatewayRole.Arn'
        IntegrationHttpMethod: POST
        IntegrationResponses:
          - StatusCode: '200'
        PassthroughBehavior: NEVER
        RequestParameters:
          integration.request.header.Content-Type: '''application/x-www-form-urlencoded'''
        RequestTemplates:
          application/json: Action=SendMessage&MessageBody=$input.body
        Type: AWS
        Uri: !Join
          - ''
          - - 'arn:aws:apigateway:'
            - !Ref 'AWS::Region'
            - :sqs:path/
            - !Ref 'AWS::AccountId'
            - /
            - !Ref 'queueName'
      MethodResponses:
        - ResponseModels:
            application/json: Empty
          StatusCode: '200'
      ResourceId: !Ref 'enqueueResource'
      RestApiId: !Ref 'APIGateway'
    Type: AWS::ApiGateway::Method
  enqueueResource:
    Properties:
      ParentId: !Ref 'v1Resource'
      PathPart: enqueue
      RestApiId: !Ref 'APIGateway'
    Type: AWS::ApiGateway::Resource
  prodDeployment:
    DependsOn: PostMethod
    Properties:
      RestApiId: !Ref 'APIGateway'
    Type: AWS::ApiGateway::Deployment
  prodStage:
    Properties:
      DeploymentId: !Ref 'prodDeployment'
      RestApiId: !Ref 'APIGateway'
      StageName: prod
    Type: AWS::ApiGateway::Stage
  v1Resource:
    Properties:
      ParentId: !GetAtt 'APIGateway.RootResourceId'
      PathPart: v1
      RestApiId: !Ref 'APIGateway'
    Type: AWS::ApiGateway::Resource
Something awesome about using AWS is the ability to auto-scale your workloads. At the risk of over-simplifying it, you set up a Launch Configuration and an Autoscaling Group to which the Launch Configuration should apply. The Launch Configuration defines the EC2 instance type, security groups, base AMI image, and other attributes for your Autoscaling Group. Once this is all set up, you can have new machines spun up automatically based on the load experienced by your application.
Something not so awesome about using AWS is when you need to update the base AMI image for your launch configuration. For example, you may have installed a new required system package or code library to your application, and you need to ensure that all your instances now and in the future have this package installed. You create a new AMI image, but now what?
It turns out that for some reason AWS does not allow us to update Launch Configurations. We are only given the option of copying an existing launch configuration. So, we need to:
- Copy the existing launch configuration "MyLC" to a new launch configuration "MyNewLC"
- While creating the new launch configuration, update the base AMI image to the new one we've created.
- Update our autoscaling group to use the new launch configuration.
This is fairly straightforward and easy enough... but I found that by the third time doing it I'd had enough and so I decided to write a script and automate the process.
(Hint: with AWS it helps to automate basically everything - any manual action is a possible human error waiting to happen)

Below is the script I ended up with. You can download this script from my Github and adapt to suit your use. You'll need to have the AWS CLI tools installed and be using a profile with the appropriate AWS permissions.
https://gist.github.com/MattHealy/9ddf69ba60ba614a5a836ee40731f8cc
#!/bin/bash

oldconfigname="$1"
newconfigname="$2"
ami="$3"

KEYNAME="my_keypair_name"
ASGROUP="my_autoscaling_group_name"
SECURITYGROUP="sg-1234"
INSTANCETYPE="t2.micro"

if [ "$oldconfigname" = "" ]; then
    echo "Usage: ./rotate-ami-launch-config.sh <old_launch_config_name> <new_launch_config_name> <new_ami_id>"
    exit
fi
if [ "$newconfigname" = "" ]; then
   echo "Usage: ./rotate-ami-launch-config.sh <old_launch_config_name> <new_launch_config_name> <new_ami_id>"
   exit
fi
if [ "$ami" = "" ]; then
    echo "Usage: ./rotate-ami-launch-config.sh <old_launch_config_name> <new_launch_config_name> <new_ami_id>"
    exit
fi

echo "Creating new launch configuration"
aws autoscaling create-launch-configuration \
    --launch-configuration-name "$newconfigname" \
    --key-name "$KEYNAME" \
    --image-id "$ami" \
    --instance-type "$INSTANCETYPE" \
    --security-groups "$SECURITYGROUP" \
    --block-device-mappings "[{\"DeviceName\": \"/dev/xvda\",\"Ebs\":{\"VolumeSize\":8,\"VolumeType\":\"gp2\",\"DeleteOnTermination\":true}}]"

echo "Updating autoscaling group"
aws autoscaling update-auto-scaling-group \
    --auto-scaling-group-name "$ASGROUP" \
    --launch-configuration-name "$newconfigname"

echo "Deleting old launch configuration"
aws autoscaling delete-launch-configuration --launch-configuration-name "$oldconfigname"

echo "Finished"
-
It's insecure. The data is sent across the Internet via an insecure protocol, FTP. This could have been remedied by using a secure file transfer protocol such as SFTP.
-
It's inefficient. Every night, we're sending an entire snapshot to the backup server. Obviously, there's a whole lot of data on the server that never changes, so there is really no need to back it up every night. To make things worse, the backup process takes longer and longer each night, as the amount of data on the server increases over time. We're needlessly wasting precious bandwidth with this solution. The ideal solution involves doing a full backup as a baseline, then only sending the changes across in each subsequent backup.
Eventually the FTP account was no longer available, so I started looking in to a better solution. I'd done a lot of work recently with Amazon Web Services, so I decided to investigate that as a backup solution. Amazon's S3 offering allows infinitely scalable, cheap object storage in the cloud. I went ahead and created a bucket which would store the backup files.
The official AWS Command Line Interface (CLI) provides an easy way to perform operations on S3 (along with most of the the other AWS services). In fact, they have a command which can sync a local folder with an S3 bucket, sending only the modified files with each sync. Armed with this new tool, I wrote a basic Perl script which would call the following system command:
system("/usr/bin/aws s3 sync --delete /var/www/html/ s3://maad-backup/html");
I set the script to run automatically at 10pm each night, and went to bed happy with the knowledge that I'd set up a simple backup solution which would cost mere cents per month.
When I awoke the next morning, I checked my emails and saw that I had a Billing Alarm email from Amazon - my monthly spend had already gone past the alarm threshold I had set! What had gone wrong? Had my account been compromised somehow? I had a sick feeling just thinking about what the current monthly spend would be by now. If indeed I had been compromised, the intruders would have spun up as many powerful EC2 machines as they could, most likely to mine for Bitcoin.
After logging on to my AWS account, I could breathe a sigh of relief - I hadn't been compromised, only stupid. My monthly spend was at about $50, up from my usual of $25-$30. Drilling in to the AWS Bill, I could see that my S3 costs for the month were well above my normal spend. The bill was reporting that I had made several million PUT operations to S3 - that is, I had loaded millions of files. Surely this couldn't be right... There would definitely be a lot of files on the web server, but nowhere in the order of millions.
Clicking around the S3 console I could immediately see the problem. One of the subfolders that I had synced to S3 contained a symbolic link - to itself.
[matthewh@folio mydir]$ pwd
/home/matthewh/mydir

[matthewh@folio mydir]$ ln -s ./ mydir

[matthewh@folio mydir]$ ll
total 0
lrwxrwxrwx 1 matthewh matthewh 2 Feb  1 12:43 mydir -> ./
[matthewh@folio mydir]$ cd mydir/
[matthewh@folio mydir]$ cd mydir/
[matthewh@folio mydir]$ cd mydir/
[matthewh@folio mydir]$ cd mydir/
[matthewh@folio mydir]$ pwd
/home/matthewh/mydir/mydir/mydir/mydir/mydir
Turns out that by default, the aws sync command will follow these symbolic links and create separate, distinct objects in the S3 bucket, even when the link points to its own directory. My script had been running for hours, creating infinite levels of directories containing themselves.

I checked the process list and confirmed that the script was no longer running, so I assume I must have hit some sort of memory limit on the server, or perhaps a hard limit on directory depth on S3.
After consulting the documentation (this would have been the ideal first step!) I realised the mistake - I had to include a parameter --no-follow-symlinks.
system("/usr/bin/aws s3 sync --no-follow-symlinks --delete /var/www/html/ s3://maad-backup/html");
Running the script again fixed up the existing mess (by virtue of the --delete parameter) and gave me the desired result - a simple, secure backup of the web server.
This could have been a lot worse - if I didn't have a billing alarm set up, and if the script had not killed itself - I could have run up a very massive AWS bill because of this mistake.
In my last blog post we looked at how to deploy our Flask application using Gunicorn on Amazon's EC2 service. That blog post was more focused on getting a very simple test case up and running, but one thing we didn't cover in detail was how best to manage our Gunicorn process.
If you recall from the previous post, we set up our server with Nginx acting as the web server listening for traffic on port 80, which forwarded requests to our Flask application server (Gunicorn) running on port 8000. This works well, except for the fact that we aren't really looking after our Gunicorn process. A Gunicorn process can die because of a coding error, or perhaps some other external factor. We also want our Gunicorn process to start again in the event of a reboot.
To kick things off, let's install supervisord:
[ec2-user@ip-172-31-6-157 ~]$ sudo pip install supervisor --pre
We need to set the configuration for supervisor. First, run the following command:
[ec2-user@ip-172-31-6-157 ~]$ echo_supervisord_conf
This should print out a sample configuration file to your terminal. Let's use this as the basis for our configuration.
[ec2-user@ip-172-31-6-157 ~]$ sudo bash -c '/usr/local/bin/echo_supervisord_conf > /etc/supervisord.conf'
[ec2-user@ip-172-31-6-157 ~]$ sudo vi /etc/supervisord.conf
At the very bottom of the script, add the following block and adjust to suit your application.
[program:myapp]
command = /home/apps/.virtualenvs/myapp/bin/python /home/apps/.virtualenvs/myapp/bin/gunicorn app:app -b localhost:8000
directory = /home/apps/myapp
user = apps
autostart=true                ; start at supervisord start (default: true)
autorestart=true                ; whether/when to restart (default: unexpected)
Save the file, and now let's start supervisor. We want supervisor to start automatically at boot time, so we will need an init script for this. Supervisor doesn't usually come packaged with an init script, but you can download one from this link.
[ec2-user@ip-172-31-6-157 ~]$ cd /etc/init.d
[ec2-user@ip-172-31-6-157 init.d]$ sudo bash -c 'wget https://gist.githubusercontent.com/MattHealy/a3772c19b6641eb3157d/raw/06932656e8a173e91e978468a10d837a69a1ecfa/supervisord'
[ec2-user@ip-172-31-6-157 init.d]$ sudo chmod +x supervisord
[ec2-user@ip-172-31-6-157 init.d]$ sudo chkconfig --add supervisord
[ec2-user@ip-172-31-6-157 init.d]$ sudo /etc/init.d/supervisord start
The above commands ensure that every time the machine is restarted, supervisor will start automatically, and in turn will start our Gunicorn process for serving our Flask app.
This blog post explains how to get your Flask app up and running on Amazon EC2. This tutorial assumes you can use a Unix-like terminal environment (e.g. Linux or Mac OS X)
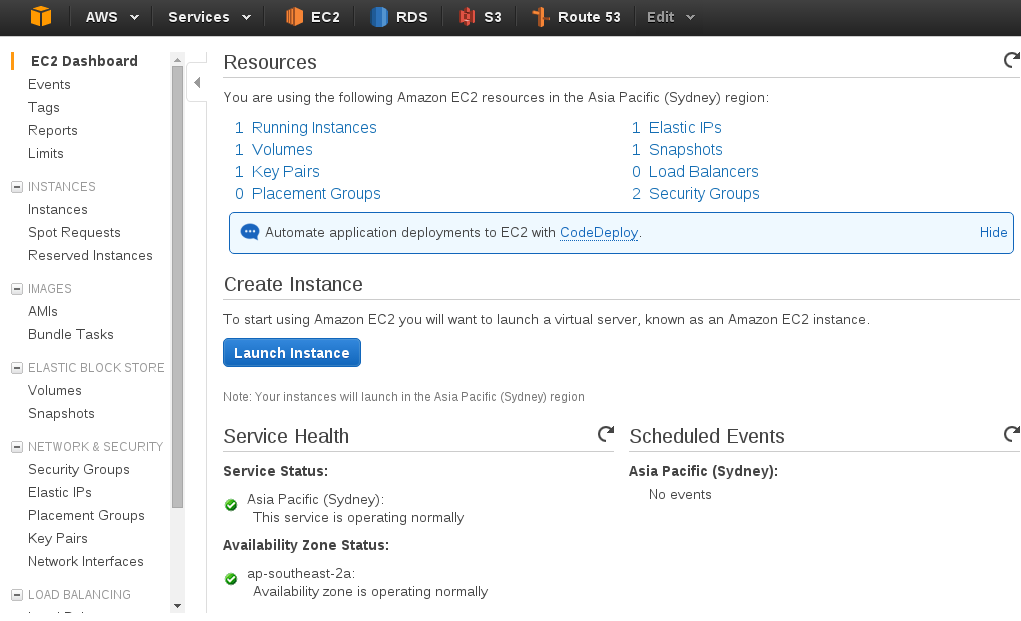
Firstly, within your Amazon Management Console, you need to create an EC2 instance. Click the "Launch Instance" button
Let's choose "Amazon Linux" as our base machine image.

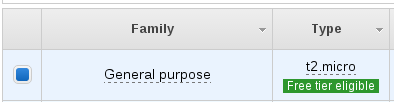
Now you can choose your machine type - to keep things within the free tier let's choose a t2.micro instance. All new Amazon Web Services customers can use the "free tier" to run certain services for 12 months at no cost.
We'll now continue with "Review and Launch"
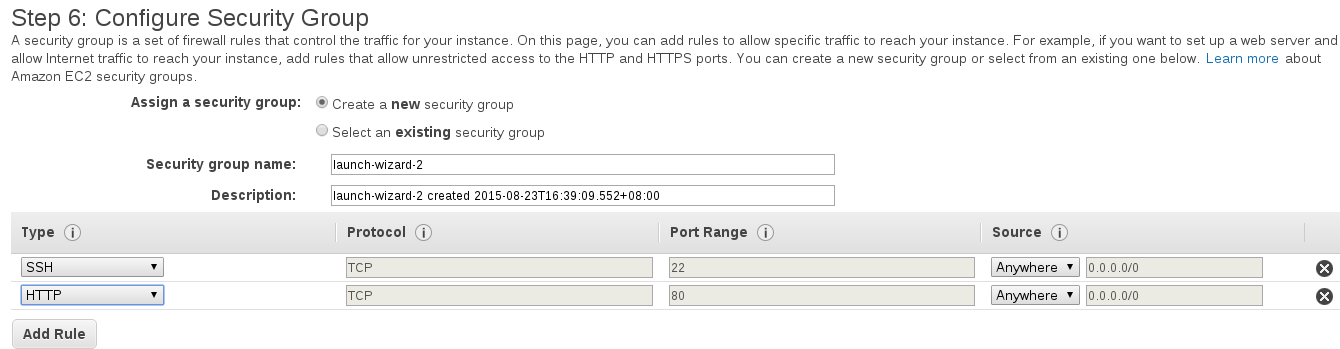
From here, we can click "Edit Security Groups" and define our firewall rules. We want to allow SSH from anywhere so we can get in and modify our instance, and also allow HTTP traffic (Port 80) to our instance from the Internet.
Go ahead and launch the instance, ensuring you either already have a key pair file or you create a new key pair.
After your instance finishes booting, you can SSH in to continue with our deployment. View the instance details to get our public DNS address:
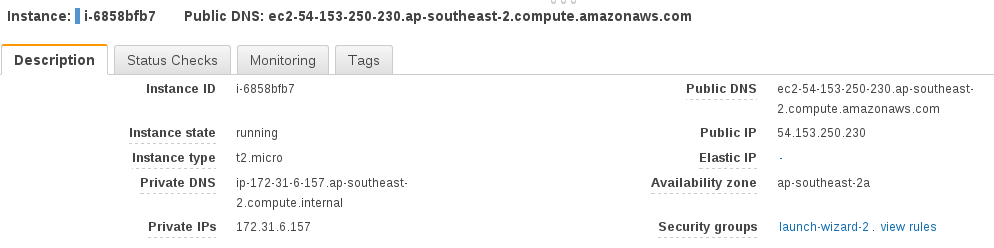
and SSH in:
ssh -i /path/to/your/keyfile ec2-user@your_public_dnsname_here
Now we want to create a user which will run our Flask app. It is a good idea to run our Flask app as a separate user and definitely not run it as root. It can be dangerous to run a service as root because if that service was to be compromised somehow (e.g. by a bug in our code) then the attacker would have access to our whole system.
[ec2-user@ip-172-31-6-157 ~]$ sudo /usr/sbin/useradd apps
Change to the apps user:
[ec2-user@ip-172-31-6-157 ~]$ sudo su apps
[apps@ip-172-31-6-157 ec2-user]$ cd ~
[apps@ip-172-31-6-157 ~]$ mkdir myapp
[apps@ip-172-31-6-157 ~]$ cd myapp
Now upload the code for your Flask app - you could do this by cloning from an existing Git repository, but for this tutorial we'll just create a simple test app. Use your favourite text editor (mine is Vim) to create app.py:
from flask import Flask

app = Flask(__name__)

@app.route('/')
def index():
    return "It works!"

if __name__ == '__main__':
    app.run(debug=True)
We'll run our Flask app in a virtual environment, so let's install virtualenvwrapper.
[apps@ip-172-31-6-157 myapp]$ exit
[ec2-user@ip-172-31-6-157 ~]$ sudo easy_install pip
[ec2-user@ip-172-31-6-157 ~]$ sudo pip install virtualenvwrapper
[ec2-user@ip-172-31-6-157 ~]$ sudo su apps
[apps@ip-172-31-6-157 ec2-user]$ cd
[apps@ip-172-31-6-157 ~]$ vi .bashrc
Add the following lines
export WORKON_HOME=$HOME/.virtualenvs
export VIRTUALENVWRAPPER_VIRTUALENV_ARGS='--no-site-packages'

source /usr/bin/virtualenvwrapper.sh
This allows us to access the virtualenvwrapper command line tools easily. Let's reload our .bashrc profile and create a virtual environment.
[apps@ip-172-31-6-157 ~]$ . .bashrc
[apps@ip-172-31-6-157 ~]$ mkvirtualenv myapp
Now install your project's dependencies - typically this will be from running pip install -r requirements.txt, but for this example I'll simply install Flask:
(myapp)[apps@ip-172-31-6-157 ~]$ pip install Flask
We don't want to use the Flask development server, as it is not safe to do so for a production environment, so let's also install Gunicorn to serve our Python code.
(myapp)[apps@ip-172-31-6-157 ~]$ pip install gunicorn
We'll need a web server installed on our instance, because we're going to forward requests from port 80 to our Flask app running internally. It is best practice to have a web server handle our port 80 requests, because the Flask application server (Gunicorn) we are using is designed to serve Python code, but not ideal for handling port 80 requests from the Internet.
(myapp)[apps@ip-172-31-6-157 ~]$ exit
[ec2-user@ip-172-31-6-157 ~]$ sudo yum install nginx
[ec2-user@ip-172-31-6-157 ~]$ sudo vi /etc/nginx/nginx.conf
Replace this line:
user nginx;
with this:
user apps;
and in the http block, add this line:
server_names_hash_bucket_size 128;
And now let's define a server block for our site:
[ec2-user@ip-172-31-6-157 ~]$ sudo vi /etc/nginx/conf.d/virtual.conf`
Paste in the below:
server {
    listen       80;
    server_name  your_public_dnsname_here;

    location / {
        proxy_pass http://127.0.0.1:8000;
    }
}
Start the web server
[ec2-user@ip-172-31-6-157 myapp]$ sudo /etc/rc.d/init.d/nginx start
And finally, let's start our Gunicorn process to serve our Flask app:
[ec2-user@ip-172-31-6-157 myapp]$ sudo su apps
[apps@ip-172-31-6-157 ~]$ cd ~/myapp
[apps@ip-172-31-6-157 ~]$ workon myapp
(myapp)[apps@ip-172-31-6-157 myapp]$ gunicorn app:app -b localhost:8000 &
This will set our Gunicorn process off running in the background, which will work fine for our purposes here. An improvement that can made here is to run Gunicorn via Supervisor. Supervisor can look after our Gunicorn processes and make sure that they are restarted if anything goes wrong, or to ensure the processes are started at boot time. I'll be writing a followup post about implementing Supervisor later on.
Now, if you visit your public DNS name in your web browser, you should see something like the below:
Congratulations! You have now successfully deployed your Flask app to an Amazon Web Services EC2 server.
I recently came across an interesting problem with one of the companies I'm involved with. Their main product is an iPad app with a backend server for syncing data back to the cloud. Their production environment resides in the AWS data centre in Sydney, but they have a secondary server in Perth which is still used by some clients on the older version of the app.
Seemingly without cause, the Perth server started experiencing problems loading image files up to S3. I investigated with the other technicians. We ruled out the obvious first:
- The code on the server hadn't been touched in over a week, so it couldn't be a code issue
- The same code was working on the production site in Sydney, indicating that the issue could be to do with the server itself.
- The same issue occurred when trying to load a file to a different S3 bucket, so the bucket wasn't the problem.
Ok, so all signs point to the server being the problem. But where to start? And how could a problem just materialise out of nowhere, with no changes being made in the last week? I already inspected our code and couldn't find anything, so it was time to look in to the third-party libraries we used. The backend is written in Perl and utilises the Amazon::S3 module.
I looked in to the Bucket.pm file and drilled down to basics. The add_key_filename method made a call to add_key. The add_key method contains a comment stating:
If we're pushing to a bucket that's under DNS flux, we might get a 307
This made me think that the problem might be related to DNS, so I deviated a bit and sanity checked the DNS responses being obtained by the server. I even tried changing the server's resolver just to make sure, but still had no success, so back to checking the Perl modules.
Looking back in to the Amazon::S3 module, specifically the S3.pm file, I investigated the actual LWP object that gets instantiated. Passing the LWP object into Data::Dumper revealed the cause of our woes:
      'Code' => 'RequestTimeTooSkewed',

      'RequestId' => '183892BBCA7FF3D2',

      'ServerTime' => '2015-06-08T06:25:25Z',

      'Message' => 'The difference between the request time and the current time is too large.',

      'HostId' => 'oOvyHbSk2B7hFlk0UgVREBzq7f5seJhCdbxf8B+cOkrYaZ76qgqt9Z0H+5CU80Xk',

      'MaxAllowedSkewMilliseconds' => '900000',

      'RequestTime' => 'Mon, 08 Jun 2015 06:41:00 GMT'
Unbelievable... after all this investigation, the answer was hiding in plain sight.
The system clock was fast by just over 15 minutes. According to the response, MaxAllowedSkewMilliseconds is 900,000 which turns out to be exactly 15 minutes. After syncing the system clock back to the correct time, the issue disappeared.
When I first started investigating Amazon Web Services as an option for hosting our web-based software at work, I was initially overwhelmed with the sheer amount of services available. EC2, ELB, EBS, RDS, S3, so many acronyms! What do they all mean, and how do they correspond to a setup on physical hardware? I would have loved to read a plain English explanation of all these options and how they all piece together, so I'm writing this post so that it can be of use to someone else dipping their toes in the AWS pool.
First off, it's useful to understand Regions and Availability Zones. AWS currently offers its services in nine regions, spread across the U.S., E.U., Asia Pacific and South America (with a special "Isolated Region" in China and another for U.S. Government services). Within each region there are two or more Availability Zones (AZ). AZ's are designed in such a way as to be geographically isolated from each other, to minimise the chance of downtime in a particular region. You would typically choose to provision your services in a particular region to minimise latency for your customers. Within that region, you can make use of Availability Zones to ensure the greatest uptime possible for your application. This can include strategies such as deploying your entire application across both AZ's, so that if one AZ was to suffer a total outage, your application will stay up.
With that in mind, let's look at a quick rundown of the main services you'd likely use with AWS:
EC2
Elastic Cloud Compute (EC2) is akin to a "virtual server" that you might use with other hosting providers. You can choose the type of EC2 instance you use, according to the amount of CPU, memory and storage space you need.
Although an EC2 instance is like a virtual server, there is a different mindset when it comes to Amazon (and indeed cloud computing in general). You need to consider an EC2 server as being stateless and temporary - you need to expect the server to suddenly be unavailable and your application needs to have logic to work around this. By not storing any application state on an EC2 instance, you have the freedom to start and stop servers at will, without disrupting your users or losing any data.
EBS
Elastic Block Storage (EBS) is like a virtual hard drive. You can provision a volume of any size as required, and attach the volume to an EC2 instance. An EBS volume can be attached to only one EC2 instance at a time, but an EC2 instance can have many volumes attached.
ELB
An Elastic Load Balancer (ELB) allows you to group together multiple EC2 instances and balance traffic to them evenly. This is a fantastic tool to allow your application to scale effectively and be resilient to failures. By spreading the instances behind a load balancer evenly across your Availability Zones, your application becomes protected against a single AZ going down.
S3
Amazon's Simple Storage Service is an "object" store - quite simply, you can upload objects, usually user-defined resources like images, videos and documents, to a "bucket" and access them via a URL or API call. S3 scales massively, meaning that you can effectively upload as many objects as you want, and only pay for what you use.
Glacier
Glacier is a similar service to S3, but it is used more for archiving purposes rather than object storage. The service is incredibly cheap, but this comes with a trade-off of slow access speeds. If you need to retrieve an existing archive, it could be anywhere upwards of four hours before you obtain your data.
RDS
Amazon offers a managed Relational Database Service (RDS), allowing you to host your SQL databases (MySQL, Postgresql, SQL Server) in a managed and controlled environment. This is fantastic for developers who either don't want to or cannot devote the time to being an expert in database administration. RDS manages backups and redundancy for you with the click of a button.
IAM
Identity Access Management (IAM) is a crucial but often overlooked part of the AWS platform. IAM is where you define who has access to your Amazon resources, what they have access to, and so on. Best practice is to create a login for each user (so they aren't sharing credentials to the "root" or "master" account), and assign them only the minimum permissions they need. For example, you might grant your developers the permissions needed to create new EC2 instances for test purposes, but not to terminate any EC2 instances. Setting up your IAM is super important - there are many horror stories out there where an attacker was able to gain access to the root login of a company's Amazon account and wipe away all data and all backups, effectively destroying the company instantaneously.
If you or your company is looking for advice on getting started with AWS, or looking to audit their current setup, feel free to get in touch with me.